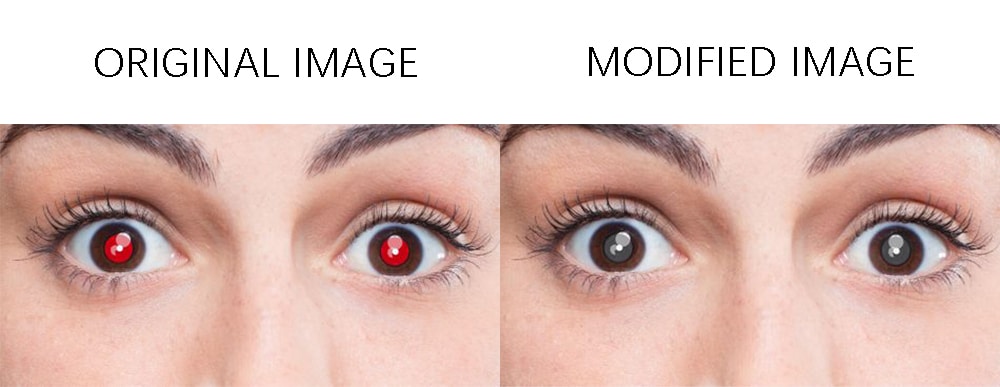
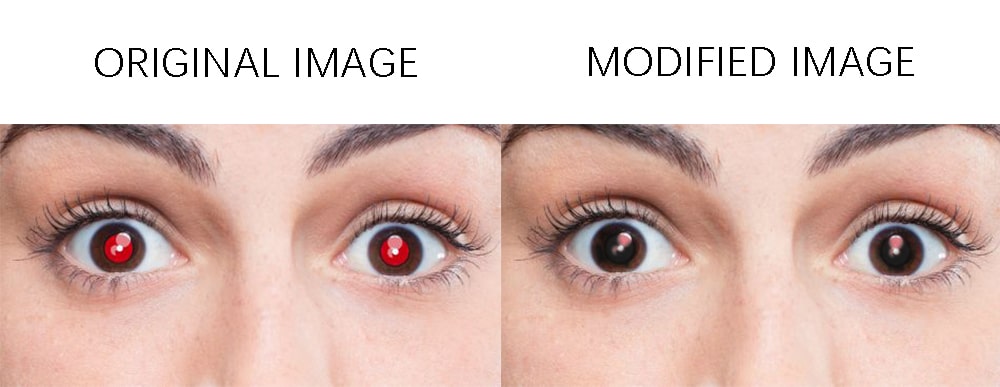
Causes:
The red-eye effect mostly occurs when the camera flash is reflected from the retina. When the light hits the eye, it makes the pupil widen. Hence, the cells at the back of the eye detect the light and convert the rays into electronic pulses. When the light is reflected it illuminates rich blood supply. In the process it causes the red color to appear in photos. Also, red eyes may be caused when if you have some eye issues or when a photo is taken when the flash is too close to the subject.
Prevention:
You can prevent this, by not looking directly at the camera lens, using a larger flash, take pictures where there is good lighting, use the anti-red-eye function, and move the flash and lens further apart. This will help solve the problem.
Red Eye remove in Seconds
How to eliminate red eyes with Photoshop:
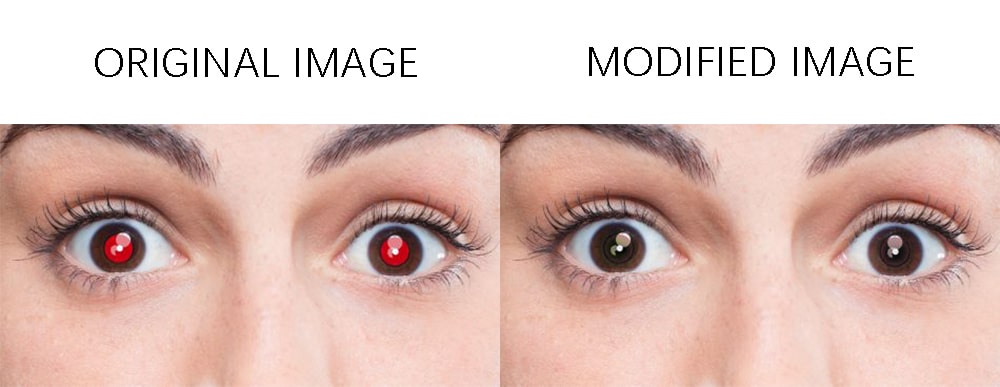
Photoshop is one of the best image editing software that you can use for photo enhancements, graphic design, photo-editing, cloning photos, removing red eyes, repairing flaws, and retouching photos. If you have red-eyes in your photo here is how you can modify it using Photoshop.
How to remove the red-eye effect using Photoshop
Step 1: Run your Adobe Photoshop software. Step 2: To open your image, click on the file option. Place or open your image from your device and click Ok. Drag and drop your image into your workspace.
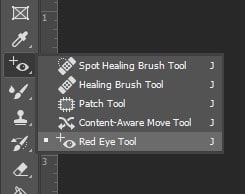
Step 3: On the left menu bar, there are some tools you can use to modify your image. Click on the spot healing brush tool and go down to the red-eye tool at the bottom.
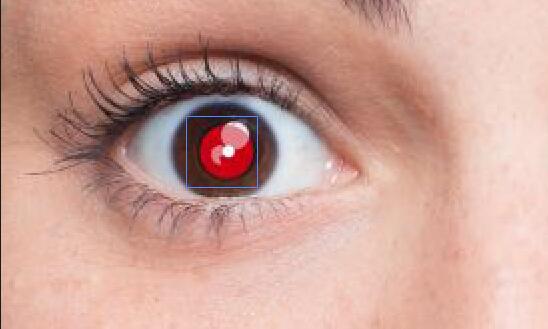
Step 4: The red-eye tool works at its best when set to 50% pupil size and 50% darkened. Click and drag around the red-eye to form a square around the pupil.
Step 5: While doing this, position the square so that the pupil remains in the center. Once you have positioned that, release the mouse.
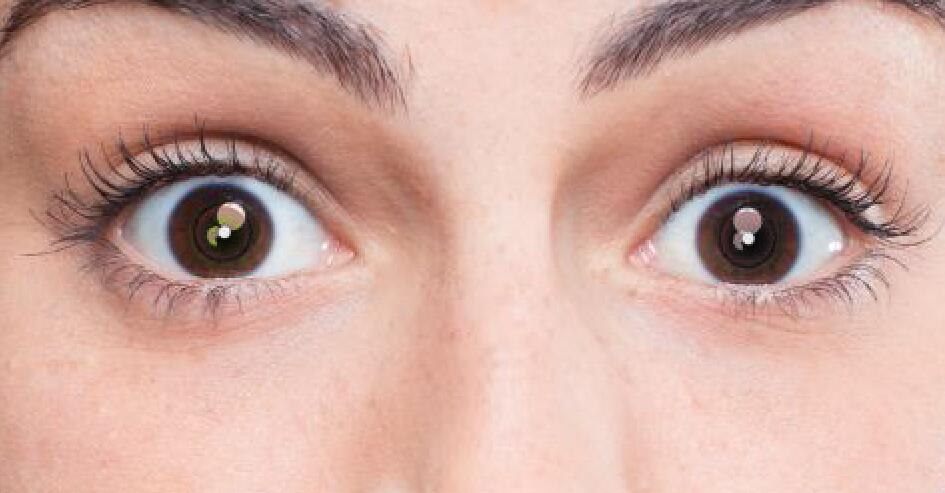
The effect of Photoshop on removing a red eye
When you use Photoshop software to remove the red-eye, it doesn’t cause any major issues on the other parts of the image. However, take preventive measures to prevent affecting the other parts of the photo. Here are practical videos you can watch to know how to remove the red-eye in your images: 1.How to remove the red-eye using the red-eye tool. 2. What causes red-eye and how to remove red-eye using Photoshop
Other software to remove red eyes
1. paintshoppro
Features of paintshoppro
The software has an animation feature that allows you to make engaging animations using any kind of image. The red-eye removal feature helps to modify images affected by the red-eye effect. The A.I powered tools help to transform photos into extraordinary images. It also allows you to give your photos unique HDR effects. Paintshoppro has the sky to sky workspace, photo mirage express, powerful photography tools, adjustment tools, selection tools, correction tools, 360 degrees camera support, and time-saving tools.
2. pickmonkey
Features of Picmonkey
Picmonkey can be used to make ideal images for Facebook, Instagram, Youtube, Pinterest, and much more. The imagery can be used to promote your brand by making ads, logos, posters, and other graphics Picmonkey allows you to modify images by tweaking exposure, touch up portraits, add effects, and a one-click background remover. It has over 8000+ graphics and textures. In retouching, you can remove the red-eye, airbrush blemishes, white teeth, and much more to make your images look more natural.
3. Fotor
If you accidentally captured red eyes in an image you took, don’t worry that can be fixed. When using Fotor, you just need to click on the affected eye, and the red-eye remover will detect and correct the redness in the eye in seconds. Simply open the photo you want to edit, use the red-eye remover, and click to fix the red-eye. Also, format and edit the image as desired to prevent it from losing its original touch. The zoom feature also helps you to see the image better and use the right brush size. However, making the change can make the eyes look sharper. The eyes may end up looking shiny that they were due to the effect of the camera flash.
4.ipiccy
Ipiccy is an online editing tool that you can use to edit photos, design graphics, make collages, and remove red eyes. Hence, if you get bad images you can fix the unexpected red eyes instantly. The iPiccy;s Red Eye corrector works magic in few seconds as long as you are accurate. You simply need to upload the photo to the iPiccy photo editor, open the retouch tab, and select the red-eye remover and apply it to the eyes. You should ensure you are accurate not to make changes to the wrong parts. However, when you remove the red-eye, it retains an insignificant red shiny spot on the eye. This can affect the pupil by blocking its main color. Hence, you need to be cautious when using the tool.
Conclusion
The red-eye effect is natural. However, certain preventive measures can be taken to ensure the eyes remain to look great. Photoshop is one of the best offline software you can use to modify that. However, the other online tools like Fotor, Picmonkey, paintshoppro, and ipiccy can also help you. Having a perfect picture is important to keep memories alive.
